


A Shiny Future Awaits with Easy Laminating Foil
TLDR
Foil lamination can give your projects that wow factor with a touch of shine. But it takes the right type of foil and techniques for success. In this guide, we’ll explore everything you need to know to make your work sparkle with foil lamination, from choosing the right foil to applying it like a pro. It’s your time to shine!
Are you looking to create dazzlingly beautiful projects that wow everyone who sees them? Foil lamination makes it possible! This easy and fun laminating method can
take your projects from ordinary to extraordinary in just a few simple steps. So how do you create beautiful foil art, and what can you use it for? We’re giving you the answers in this article. We’ll cover:
- Why you should choose laminating foil for your next project
- How to get started with quality foil finish
- Tips and tricks for laminating foil success
- Foil lamination trends you can follow
Why Choose Laminating Foil for Your Next Project
There are many foil laminating benefits for anyone who uses it, whether you’re a parent, teacher, small business, or even a large corporation. First of all, foil lamination is user-friendly for even the newest of newbies. You don’t need any special die or fancy equipment to transform your documents from drab to fab in minutes. All you need is:
- Your dry toner-printed document
- A compatible pouch laminator
- A pouch carrier
- Your laminating foil
- …And a little know-how!
Laminating foil also makes your documents more durable in the long term, protecting the covered areas from spills, smudges, and wear and tear. Plus, it’s very affordable, only costing about $0.04 to $0.08 per letter-size page, and is versatile with numerous applications across various industries that want to elevate their brand.
Foil Lamination for Branding
Foil lamination doesn’t just add a shiny touch - it makes your brand pop in a way that’s virtually impossible to ignore. When you coordinate the colors with your logo or company colors, you create a cohesive yet eye-catching design. The best part is that virtually any industry can use it to make their brand stand out.
For example, boutique shops can use foil lamination to create unique business cards that tell their story. Foil laminating on packaging or loyalty cards can turn a simple purchase into a memorable experience. Similarly, graphic design studios can elevate their clients’ branding materials, whether that’s brochures, pamphlets, or posters.
Event planners can make first impressions count by adding foil lamination to the front of invitations. Wedding planners and bridal shops can do the same, going a step further to foil laminate place cards and thank you cards.
It doesn’t stop at creative businesses. Even consulting firms can use foil-laminated covers on their proposals to demonstrate their commitment to quality. Corporations can also use them to make attractive and professional certificates and awards for outstanding employees. With these businesses, it’s not just about lamination - it’s about making a statement.
Getting Started with Quality Foil Finish
If you’re interested in using easy laminating foil for your business, you’ve got to know the options available to you and how to do it for the best result.
The Different Types of Easy Laminating Foil
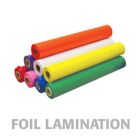
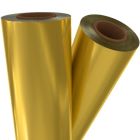
Various types of laminating foil are available to really help your designs shine. Most laminating foils are available in four sizes:
- 8” x 100’
- 12” x 100’
- 24” x 500’
- 24” x 1000’
Laminating foil is also available in a variety of styles:
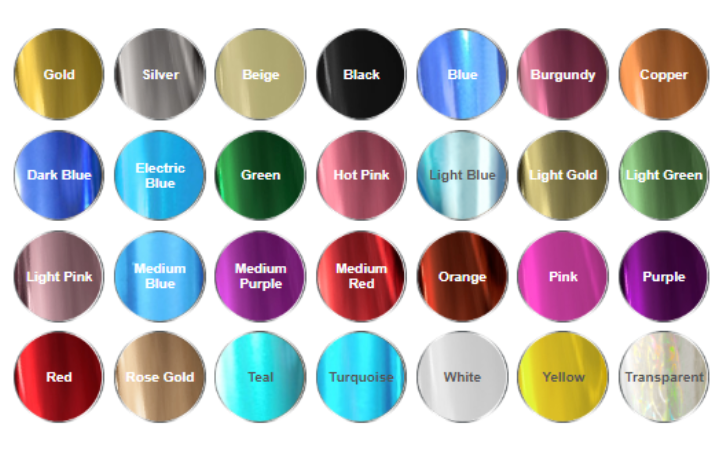
You can choose between almost 30 colors so you can match your company’s design needs. Here are some of the most popular:
How to Choose the Right Foil for You
With so many options available, how do you choose the best laminating foil for you? It’s not all about the shine. You need to match the vibe and purpose of your project so it all comes together cohesively. There are several factors to consider when picking foil for your project.
First, consider the event. You want your project to stand out in a good way, not like a sore thumb. A high-end product launch may need some extra shimmer and shine, while a subtle, sophisticated sheen may be better for a professional business card.
Then, consider the color and finish so the foil lets your project’s personality shine through. Going for classic elegance? You may choose a subtler gold or silver matte metallic or satin matte foil. Maybe even a glossy black foil over a matte black paper for some serious minimalistic elegance. Perhaps you want something more bold. Holographic or glitter foil would be just what you need to make a statement that turns heads. Whatever your objective, your foil’s color and finish should complement the theme and message of your project.
Finally, consider your budget. Certain foils may be more expensive than others. For example, holographic foil can be almost twice the cost of metallic foil.
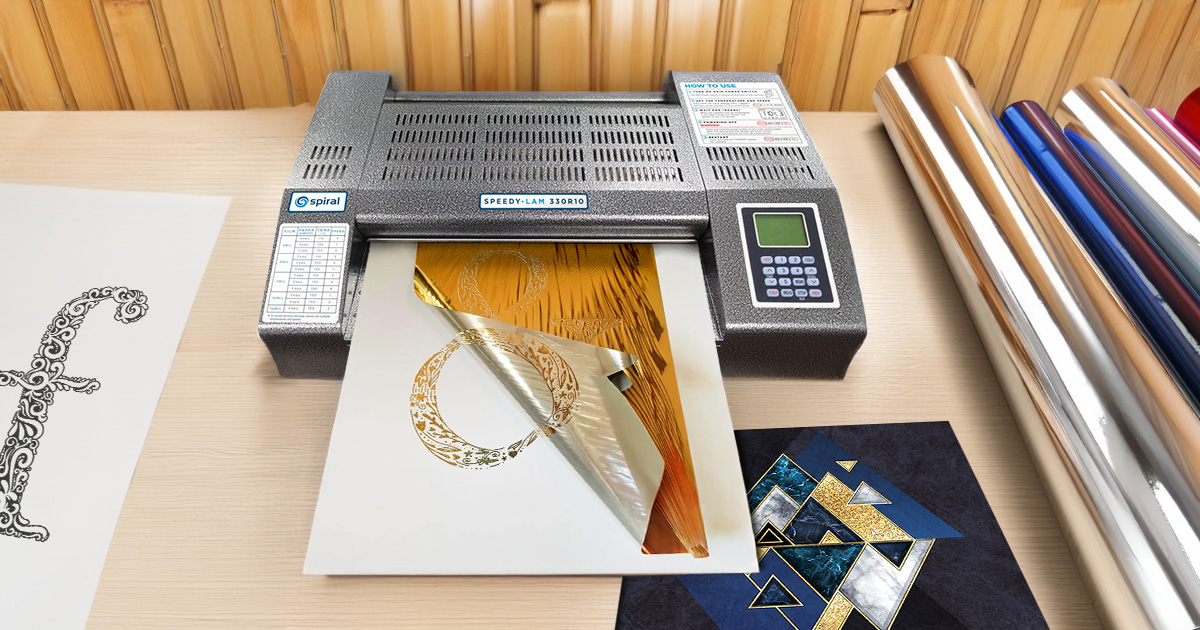
A Step-by-Step Guide to Using Easy Foil
Once you’ve got the right foil, it’s time to put it to use. Just like the name suggests, easy foil is very, well, easy to use! You can complete the process in six steps:
- Print your document with a dry-toner printer for foil-laminated printing.
- Trim the foil so it’s slightly bigger than the area you’re foiling and place it over the printed portion.
- Place the document and foil inside a pouch carrier.
- Run the carrier and document through the laminator.
- Let the document cool for a few minutes.
- Peel off the foil sheets - that’s it!
Tips and Tricks for Easy Laminating Foil Success
There are several factors to consider to get the best results. Let’s see some mistakes you can avoid and useful tips and tricks for success.
Avoid These Common Mistakes
First, there are some common mistakes that many beginners make when foil laminating. Troubleshooting issues becomes easy when you know what to avoid. Some common mistakes include:
- Choosing the wrong type of foil: Avoid using aluminum foil or tin foil to laminate your projects. This can be dangerous for both you and your laminator since these foils aren’t designed to handle the heat and pressure from the foil laminating process. Always be sure to use laminating foil made for this purpose.
- Using faded or opaque images: This causes your foil to turn out spotty because the foil can’t adhere to the toner.
- Printing with wax-based ink: Easy foiling only works with toner from a laser printer.
- Using textured paper: While textured and coated paper can add interest to your project, it can keep the foil from holding onto the toner, leading to those dreaded spots and jagged edges that make your project look messy.
- Choosing the wrong laminator: Avoid choosing a laminator without adjustable speed and temperature controls. It needs to fit 10 mil pouches or higher, allow you to raise the temperature to 300° F or higher, and let you slow the speed so the foil can reach the right temperature when it goes through.
Follow These Techniques for Maximum Effectiveness
While there are mistakes you must avoid, there are also several techniques to follow to get a smooth, clean, and glorious foiled project:
- Use vector-based images so you can change the size without losing clean edges.
- Print everything in solid black unless using transparent underlay foil like holographic foil.
- Use smooth, uncoated, glossy paper compatible with laser printers.
- Use a laminator that can handle 10 mil thicknesses or higher.
- Cut pieces of foil to fit each section you want to be foiled for print and foil on the same page or multiple foil colors on the same page.
- Cover non-foiled prints with a thin sheet of paper to avoid toner transfer to the carrier.
- Make sure your print is no smaller than 6 pt so the foil can stick to the toner.
Get Creative with Your Projects
Once you’ve got the know-how, you can go crazy with your foiled creations! Don’t be afraid to get creative and make some fun laminator projects!
For example, you don’t have to stick with a singular color foil for your project. You can cut out multiple colors to cover different printed sections for a radiant project that catches the eye and impresses.
Got kids? You can make fun laminator projects with foil, such as frame prints, cards for friends and family, and even colorful notebooks they can scribble and journal in.
You can even make metallic stickers by using your foil with sticker materials or create stunningly vibrant DIY foil art with stencil designs. The sky is truly the limit when it comes to foil laminating.
Upgrade Your Projects Today
When completed properly, foil lamination can elevate your projects and allow your creativity to soar. The quality of your equipment and supplies can make all the difference in how your project turns out. Here at MyBinding, we provide high-quality laminating machines, pouch carriers, and foil to make your foil lamination process a shining success.
Are you ready to harness the power of easy foil lamination?
Need help selecting the perfect foil laminator or foiling supplies for your projects? Call us at 1-800-944-4573for help.


Got Questions ?
Chat with one of our
friendly sales staff.
Validate your login
Sign In
Create New Account