


Buyer's Guide: How to Choose a Binding Machine
Need help finding the best binding machine for your unique needs? Whether looking to make professional documents for your business, fun notepads for your Etsy shop, or streamline your growing production plant, we have the perfect binding solution for your low, medium, or high-volume needs.
The first step before choosing a binding machine is to choose your binding style. During this process, you will consider things like:
- The price of consumables.
- The initial equipment investment.
- The look and visual appeal you want.
- The feeling you want to emit.
- How often your documents will be handled.
- Who will be handling the documents (i.e. professionals or children).
- Your volume (per batch and over a period of time)
- Whether you only need to use the one method or want the option to expand into additional options in the future
In this comprehensive document binding machine buyer’s guide, we will help you understand the basics of the most popular binding styles, sectioning them out into punch-and-bind vs. no-punch-required options. We will talk about the supplies and machines available within each category, the things you need to bind, stand-out equipment features that make an impact, how to bind, who uses each type of binding style, and a summary with key takeaways.
We will cover the following binding topics:
Comparing Punch-and-Bind Options
Punch-and-bind is exactly what it sounds like. It includes any binding method where there are holes punched along the edge and then a spine is inserted into those holes to complete the bind. Often considered the traditional binding style, it includes things like twin loop wires (Wire-O), plastic spiral coil, plastic comb, and even ring binders. Below we will focus on the styles that require an actual binding machine to accomplish.
Wire-O Binding
Wire-O Binding Supplies:
Wire-O is one of the most popular options because of the clean and professional finish. It is made of metal and has twin or double loops that are inserted into each hole. The holes are most often square and spaced out in two different pitches (hole spacing), including either 3:1 or 2:1 pitch. Because it is made of metal, when it is bent it is challenging and often impossible to bend back to its original shape, which makes it more fragile than spiral plastic coils (which we will talk about below).
Wire-O Binding Machines:
The equipment for wire binding typically includes a punch and a wire closer. The punch will create the holes in your pages while the closer will bend the open wires into a circle to actually bind them.
What You Need to Wire-O Bind
- 3:1 or 2:1 pitch Wire-O binding machine
- Wire closer (if not included on your machine)
- Wire binding spines
- Report covers (optional)
Great Equipment Features to Look for & Why
- Wire hanger: This simple feature makes binding much easier. It holds your wire in-place so you can place your pages onto it without risking the pages falling off. Without a hanger, you would be placing your open wire on the table and carefully placing pages perpendicular. With a hanger, you can hang the pages completely from the wire.
- Wire closer: This is a required feature in order to bind, but not all punch machines include it integrated into the same unit. Modular punches, for example, use separate wire closing units that can sit beside or be mounted to the top.
- Combo pitch punching: If you want to use the full range of Wire-O sizes, then look for a combination punch that will handle both 3:1 and 2:1 pitches. Some 2:1 wires come in the smaller sizes, but they are considered specialty, so are not always available and only sold in select colors. Plus, most users prefer the look of the more closely spaced holes of a 3:1 for the thinner books.
- Disengageable pins: This unique feature lets you customize your punch pattern. It is a must-have when binding anything other than standard letter size 8.5” x 11” pages on the 11” edge. Without the ability to stop the machine from punching specific holes, you could end up with partially-punched holes on the edge of your page when doing the more unique lengths.
How to Wire Bind
- Hang your open wire on the wire hanger.
- Punch a test page and disengage any pins causing partial holes (if applicable)
- Line up your pages and punch them with your machine.
- Don’t punch more than the recommended capacity; punch fewer at a time if you feel the machine straining. Punch just one report cover at a time.
- Thread your pages onto the open wire on the hanger. Start with both covers together and facing each other to ultimately hide the spine.
- Continue punching and threading until you complete your stack.
- Carefully take the wire off the hanger and, holding your book by the pages, place the wire down into the closer.
- Ensure the closer is set properly for your Wire-O diameter. Too small will over-close and too large won’t fully close the wire around your pages.
- Slowly pull the handle to close your wire. Watch the wire as you do this step so you can adjust how firmly you pull the handle.
Who Uses Wire-O Binding
Because of the professional binding finish and higher consumables cost, wire is traditionally used by businesses wanting to create high-end presentations and reports. It is also used by print shops and binderies who produce mass notebooks and journals for retail sale. But even the smaller user can benefit from this binding style, making it a great choice for Etsy shop owners. Other common users include small businesses, law firms, real estate agencies, hospitality, medical, and more.
Twin Loop Wire Sizing Guide

TLDR for Wire-O: Key Takeaways & Things to Note
- Professional binding with a clean finish
- Allows pages to turn completely, front to back
- Made of metal
- More expensive than plastic options
- Cannot be unbound without using a new spine to re-bind
- Metal wires can bend under pressure; not super durable
- Aesthetically pleasing to look at and handle
- Versatile for various industries: businesses of all sizes, legal, real estate, medical, hospitality, home business, & more
Spiral Plastic Coil Binding
Plastic Spiral Coil Binding Supplies:
Spiral coils are, by most standards, the most popular binding option out there. This is primarily because of the balance they offer between price, durability, and appearance. Standard plastic coils are 4:1 pitch with 4 holes/spirals for every inch of binding edge. They come in a huge selection of standard colors and can even be made in more specialized colors with low minimum requirements. The plastic is incredibly durable and bounces back when bent, making books surprisingly long-lasting.
Spiral Binding Machines:
The equipment for coil binding typically comes in two configuration options: a punch without an inserter and a punch with an inserter. Inserters are not required for use, but are helpful when binding more than a few books at a time.
What You Need to Coil Bind
- 4:1 pitch plastic coil binding machine
- Coil roller inserter (optional; if not included on your machine)
- Coil crimper or pliers (optional; if not included on your machine)
- 4:1 pitch plastic coil spines
- Report covers (optional)
Great Coil Equipment Features to Look for & Why
- Electric coil inserter/roller inserter: A roller inserter is not required for use, but can be especially helpful when binding more than a couple documents at a time. It typically consists of two rollers, one stationary and one that rolls when a switch is flipped or a foot pedal pressed. Without an inserter you would manually roll the coil through each of the ≈44 holes, but with it, you would only have to manually insert it through the first couple of holes. Then you hold your book up to the roller and let it grip the coil and roll it through the rest automatically.
- Disengageable pins: This key feature allows you customize the holes in your punch pattern with more control. It is a gotta-have if you bind anything other than standard 8.5” x 11” letter size paper on the 11” side. If you do not have disengageable pins, you do not have the ability to stop the machine from punching specific holes, which means you may end up with partially-punched holes on the edges of your pages.
- Electric crimper: When working with large volumes of books, an electric crimper can really save the wrists of your operators. Instead of manually cutting and crimping each end of the coil, these modules electrically cut and crimp in one motion. You can get a one-sided or two-sided version.
- Spine former: If your machine doesn't have an indented curve on the front, then you should absolutely get a binding sleeve as an accessory. Whichever one you use, these spine formers create the ideal curve for your book block to make inserting the curved coil easier.
- Sizing guide: Usually simple notches that look like a flight of stairs on the front of the machine, this simple feature helps you choose the best coil diameter for your book based on its thickness. Simply assemble your pages, including covers, and leave them loose as you slide them into the guide. Without it, you would be breaking out the old ruler and using a reference guide for this task.
How to Coil Bind
- Align the pages and punch them in batches. Punching a test page is always a good idea. Never overload the machine with more than the recommended capacity. Punch fewer if you feel the machine straining. Punch just one report cover at a time.
- Place your punched stack in-order into the spine former.
- Insert the coil through the holes.
- If using an electric inserter, just insert it through the first few holes and hold it to the roller to do the rest
- If not using an electric inserter, manually insert the coil through all holes.
- Leave about 1/2" of coil on each end of the book.
- Cut/crimp each end of your book.
Who Uses Spiral Coil Binding
Spiral coil binding is widely used across many industries, from printing and creative services to education and travel. It is even used in publishing. Because it offers a great balance between a professional finish, durable bind, and affordable consumables, they are a popular choice for printing companies, artists, corporate offices, hospitality businesses, schools, daycares, and more. Popular applications for coil binding include journals, cookbooks, sketchbooks, crafts, presentations, proposals, calendars, and more.
Spiral Coil Sizing Guide

TLDR for Plastic Spiral Coil: Key Takeaways & Things to Note
- Fairly professional-looking finish
- Incredibly durable and long-lasting spine
- Allows pages to turn completely, front to back
- Made of plastic
- Perfect middle-ground for price and value
- Cannot be unbound without using a new spine to re-bind
- Huge collection of stocked colors + quick-ship specialty colors
- Versatile for various industries: businesses of all sizes, legal, real estate, medical, hospitality, home business, & more
Plastic Comb Binding
Plastic Comb Binding Supplies:
Probably one of the first visuals you get when thinking of a binding spine is of a plastic comb. This classic, popular binding method is simple, easily customizable, and —one of the biggest selling points— affordable. One of the key benefits of plastic comb binding is that your book is editable as many times as needed, without needing a new binding spine to put back together. That is because the combs open and close through the holes. The teeth within each hole are flexible and curved, while the spine is more rigid for stability. The spine can also be custom printed on, so you can label your documents; this is the only punch-and-bind method that lets you do that. Need a special size? Just use some scissors to cut them down or order special size combs online.
Plastic Comb Machines:
Buying a plastic comb binding machine is pretty straightforward, as the huge majority of machines will have everything you need to complete your book. This will include the punch itself as well as a comb spreader or opener. You can choose from a manual or electric punching mechanism, but the comb spreader will always be manual.
What You Need to Plastic Comb Bind
- Plastic comb binding machine
- Comb opener (if not included on your machine)
- Plastic binding comb spines
- Report covers (optional)
Great Equipment Features to Look for & Why
- Disengageable punch pins: This awesome feature lets you choose which holes in the machine will punch and which ones will not. While not required for use, it is a key option when binding any sizes other than common 8.5” x 11” letter size pages on the 11” end. Without this, making special-size books could leave you with half-punched holes on the edges.
- Size guide: These simple “stair” notches on your machine help you determine the best coil size for your book thickness. Easy to use, just assemble your entire book (with covers) and leave the sheets loose as you slide them into the guide. If your machine doesn’t have this, you can use our size reference guide for this task.
How to Plastic Comb Bind
- Place your plastic comb spine on the comb opener and pull the handle to open the teeth.
- Punch a test page and disengage any pins causing partial holes.
- Line up your sheets and punch them in batches, always sticking to the recommended capacity. Punch fewer pages at a time if you feel the machine strain, it is hard to punch, or it makes a lot of noise. Punch just a single report cover at a time.
- Place your punched pages in order onto the open comb.
- After all pages are added, push the handle back to close the comb.
Who Uses Plastic Comb Binding
Because of the affordability and editability of combs, they are most commonly used by businesses who are cost-conscious and may possibly need to edit documents or even re-use combs again. The large maximum capacity makes them a popular choice for proposals in particular. Other common documents bound with comb include: training manuals, recipe books, reports, school projects, and more.
Plastic Comb Sizing Guide

TLDR for Plastic Comb Binding: Key Takeaways & Things to Note
- Most affordable consumables for any punch-and-bind solution
- Easy to edit documents as many times as needed
- They can even be reused on new books
- Made of plastic with a rigid spine for stability of even large books
- Can be custom printed on the spine
- Does not allow pages to turn from front-to-back
- Allows pages to lay flat
Velo Binding
Velo Binding Supplies:
Velo binding is the ultimate punch-and-bind solution for anyone that needs a tamper-proof, semi-permanent finish. Two strips —one with thin long prongs and the other with tiny holes— are actually melted together with heat, creating a seal that can only be unbound with a special tool.
Velo Machines:
Hot knife velo binding machines are on the higher end for an initial investment, limiting the users to those who bind frequently. They will punch 11-tiny holes along your 11” binding edge and melt the velo strip together. Smaller volume users can often get their books bound with velo at a local print shop who owns a machine.
What You Need to Velo Bind
- Hot knife velo binding machine
- Velo binding strips
- Debinder tool (optional)
- Report covers (optional)
Great Equipment Features to Look for & Why
- Multiple punching options: This simple feature allows you to customize the machine for each user and their convenience and preference. Some machines are activated via only a push button while others offer push button, foot pedal, and even automatic sensor options.
- Higher punch capacity: If you are binding thicker books, then you can drastically speed up the process by choosing a machine with a high punching capacity. Some of the top of the line machines can punch around 22 sheets at a time while lower level machines can handle 15.
- Thick binding capacity: The largest velo strip can handle a 3” thick book, so choosing a machine that can handle the full capacity will be ideal for anyone who wants to utilize this style of binding to its fullest.
How to Velo Bind
- Punch your sheets in the machine, using only the recommended capacity or fewer
- Place the back strip onto the indicated pins of machine with the textured side facing away from the pages
- Place your project face-up on top of the strip
- Insert the pronged velo strip through the holes from the front
- Turn on the bind function to initiate the heated knife to cut and melt your strips together
Who Uses Velo Binding
Because of the security and professional look velo binding offers, it is the premier choice for legal documents of many kinds. Things like legal briefs, appendices for court, contracts, evidence documents, financial statements, and audit reports are some examples. Other businesses that commonly use velo to bind documents include financial institutions for reports, audit documentation, and client portfolios, consulting firms for proposals, and government agencies for sensitive records and policy documents.
Velobind Sizing Guide

TLDR for Velo: Key Takeaways & Things to Note
- Tamper-proof binding
- Minimalistic and professional look
- Bind extra thick books up to 3”
- Limited color selection
- High equipment investment
Modular Binding
Modular Punch Binding Supplies:
Modular binding machines are a unique category because, by-their-nature, they can work with a variety of different binding supplies. The key is the punching die you are using, as that determines the kind of supplies you can use. Depending on the machine, they can work with plastic coils, wire, comb, 3-ring binders, velo bind, and much more. Some even offer custom patterns.
Modular Machines:
These machines are known for their versatility, as all you need to do to switch between different binding styles is swap out a die. They are typically punch-only units for this reason, so you can customize your system from the get-go. Modular binding units are sold separately for those who need them.
What You Need to Modular Bind
- A modular binding punch
- Compatible die(s) for your selected binding style(s)
- A binding module/finishing machine for your selected binding style(s)
- Binding spines for your selected binding style(s)
- Report covers (optional)
Great Equipment Features to Look for & Why
- Electric punching: This simple feature can greatly reduce operator fatigue and strain. They are typically controlled with a foot pedal so you can have both hands free to handle the document. With a manual machine, you would have to hold the pages in place as you pull a handle to punch.
- Disengageable punching pins: For this feature, you will specifically be looking at the dies instead of the machine itself. The majority of dies designed for these units will have this feature. It essentially lets you stop the machine from punching individual holes, preventing half-holes on the edges when you work with special sheet sizes.
- High punch capacity: The machines are almost always considered “heavy duty” by nature, so high speed capacities are common. Looking for something over 25 sheets can drastically improve your efficiency and workflow for larger projects.
- Ability to mount a binding module: Some systems offer mounting kits that let you mount a binding module directly on top of the machine. Alternatively, customers can use the binding module to the side, which can allow multiple users to work on the same project together.
- Quiet dies: Some manufacturers like Rhin-O-Tuff have quietized dies that make the punching process significantly quieter than other machines.
- Quick-change dies: The ability to switch between styles quickly and easily makes day-to-day use of the machine much simpler.
How to Modular Bind
Modular binding will depend on the style of binding you choose. But here are some simple steps for how the machines work:
- Slide in your die of choice
- Punch a test page and disengage any pins causing partial holes
- Align your guides and punch your pages in batches, never going over the recommended capacity
- Use your binding module to attach a spine to your pages
Who Uses Module Punch Binding
Because of the versatility these machines offer with the removable and changeable dies, they are most commonly used in print and copy stores and at on-demand binderies. Basically, anywhere where a user might need to switch from coil to comb to wire in one day without taking up much space. Offices, schools/educational institutions, and businesses that produce various types of binding requests are also popular buyers.
TLDR for Modular Binding: Key Takeaways & Things to Note
- Binds multiple binding styles
- You choose your machine configurations
- Typically heavy duty machines
- Easy to change out dies
- Adaptable for growing businesses
- Higher upfront investment; long-term savings
Automatic/Industrial Binding
Automatic Binding Supplies:
The supplies you use will depend highly on the machine you choose as well as it’s capabilities. Some machines can handle various types of bindings while others focus on just one. That said, these machines will often use spooled supplies, such as Wire-O spools.
Automated Machines:
These floor-standing systems take up a significant amount of space on the floor of your workroom and definitely have the industrial look you would expect. They vary greatly in functionality and binding style, including things like automatic punching machines, automatic inserters, and fully automated punch-and-bind systems.
What You Need to Automatic Bind
- Automated binding machine of choice
- Compatible binding supplies
- Report covers (optional)
How to Automatic Bind
Due to the complexity of the machines and the different kinds of binding styles, a general how-to overview would not accurately reflect the machine variations. We encourage you to check the user manual for machines you are interested in for details or contact our sales representatives for expert support.
Who Uses Automatic Binding
Automated binding equipment is used exclusively by print shops and bindery companies who produce tens of thousands of documents every month. This might include university print shops, large corporations, government agencies, and other organizations too.
TLDR for Automatic Binding: Key Takeaways & Things to Note
- High initial investment
- High-volume, high-efficiency
- Can sometimes handle multiple binding styles
- Automates punching, binding, and finishing processes for incredible productivity
- Consistent quality from end-to-end
- High output capabilities, often ranging from 500 to 5,000 sheets per hour
- Often requires installation and training
- Reduced labor costs

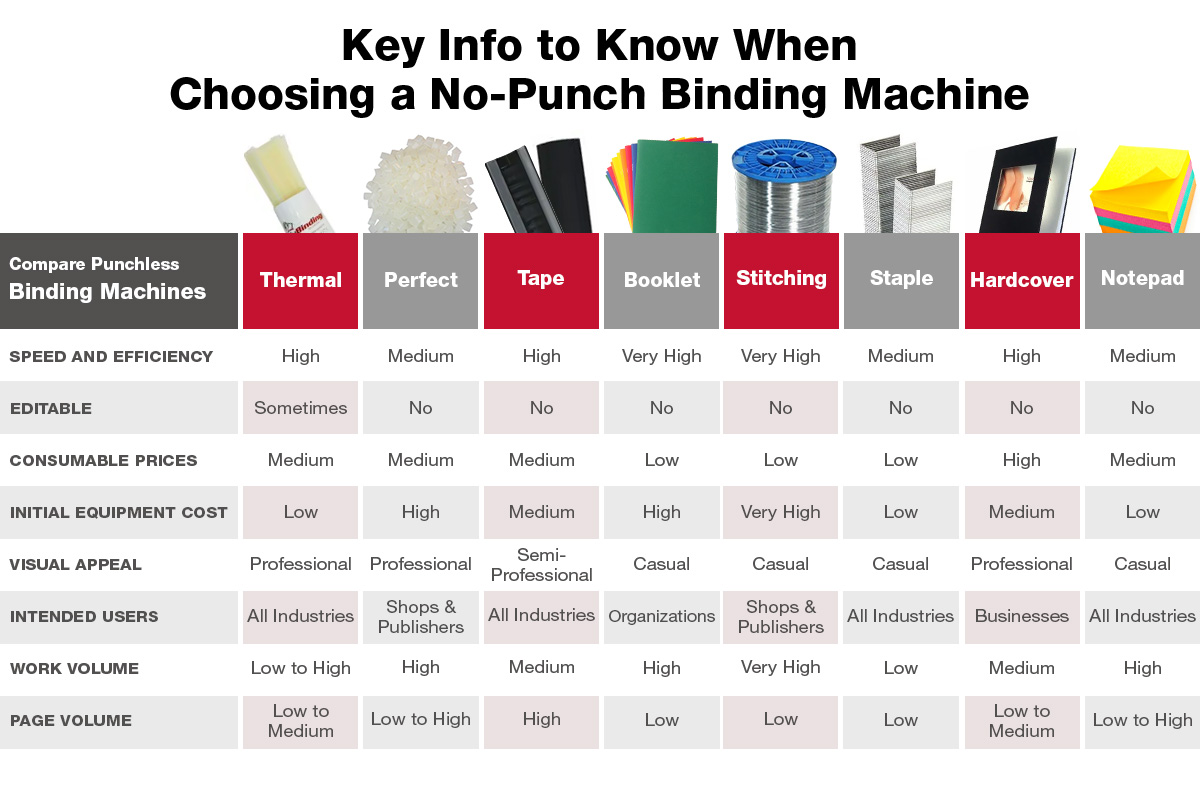
Comparing No-Punch Binding Machine Options
No-punch machines cover a much wider range of types of binding, as it covers every method that does not include punching holes and then inserting a spine. No-punch binding uses heat, glue, tape, staples, and stitches to achieve that perfect bind. The main thing to keep in mind when it comes to choosing a no-punch binder is page count and production volume. Below we will discuss the different types of no-punch binding machines and if they might be the right fit for your next project.
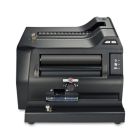
Thermal Binding
Thermal Binding Supplies:
Thermal binding supplies are exceptionally versatile, letting you choose between hardcover or softcover, fully wrap-around covers. They have an adhesive pre-applied in the spine that heats up in your machine and binds your pages together. Easy and fast to make, covers come with clear fronts, frosted, linen, or premium hardcovers that have a leather-like look. They even have customizable options with labels you can print and attach. Thermal binding covers also come in several professional colors and allow you to bind between 2 to 500 total 20# sheets. Because they are a binding spine and cover all in one, you don’t have to buy these components separately anymore. They are very professional and leave a lasting impression.
Thermal Machines:
Thermal binding machines come in several sizes for different levels of users, but all offer one key feature: efficiency, speed, and drop-and-go technologies. They are all tabletop machines with the primary differences between them being the volume of books they can handle at one time and whether they have continuous loading. Some thermal binding machines are up to 45 times faster than traditional punch-and-bind methods.
What You Need to Thermal Bind
- Thermal binding machine (we recommend Coverbind thermal machines)
- Thermal binding covers (here are the Coverbind covers)
Great Equipment Features to Look for & Why
- Continuous loading: If you need to bind in larger batches, then choosing a machine with this feature is your best bet. It lets you continuously add more documents as they move over a conveyor of sorts so you can get all of your documents binding more quickly. Without this feature you would be binding one to a couple at a time, depending on their thickness, and waiting for those to finish before doing your next few. This lets you drop in book after book until your batch is complete.
- Drop & Go technology: Any thermal binding machine that lets you drop in your documents and walk away while the machine does all the work will increase efficiency and reduce operator training and fatigue. Whether doing small or large batches, this can make a big difference in productivity as your users can do other tasks while the books are binding.
How to Thermal Bind
This differs a bit for manual versus continuous load machines. We will quickly outline the basic steps of both.
Manual machine:
- Place your pages into your cover of choice
- Drop the cover onto the heat plate of your machine
- Wait for the machine to tell you it is done & move your cover to the cooling rack
- Allow to cool for 10-15 minutes for best adhesion before opening or handling your document
Continuous-load machine:
- Place your pages into your covers of choice for all your books
- Load all of your books onto the conveyor, one-by-one or in batches, depending on their thickness
- As they come out of the other side, place them on a cooling rack at 10-15 minutes for the best adhesion before opening or handling
Who Uses Thermal Binding
Because of the professional finish, thermal binding is the ideal choice for professional businesses who create reports for high-end clients or simply want their in-house documents to match their corporate aesthetic. Because of how easy and fast they are to bind, they also make a great choice for churches, schools, print shops, and other organizations who may need to bind in large batches or where there might be several users. Popular applications include yearbooks, anthologies, and presentations.
Thermal Cover Sizing Guide

TLDR for Thermal Binding: Key Takeaways & Things to Note
- Fastest binding method on the market
- Depending on machine, up to 45 times faster than punch-and-bind
- Easiest binding method on the market
- Tabletop machines for low to high-volume users
- Works with thermal hard or soft wrap-around covers
- Binds up to a 500 sheet or 1,000 page book
- Reduced labor costs
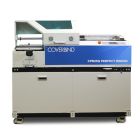
Perfect Binding
Perfect Binding Supplies:
Perfect binding is the industry standard for publishing. The huge majority of soft cover books —like novels, coloring books, and product catalogs— are bound in this method. As you can imagine, that means that the intended user is high-volume. The supplies used in perfect binding are fairly customizable. Basically the only thing you need to be compatible with your machine is the glue, which typically comes in little pellets that are melted in the machine. Different machines and books may call for EVA or PUR glue. EVA glue is ideal for standard paper or lightly coated stock while PUR glue is ideal for hard-to-bind stocks like coated, heavily printed, etc. The book cover and book block pages can be nearly anything you want.
Perfect Bind Machines:
Perfect binding machines come in either tabletop or floor standing versions, but are all fairly large and will need their own dedicated workspace. How they work is by running your book block over knives called notching pins that rough the edge. This creates an ideal texture for glue adhesion. They then apply a heated glue to the spine and move it onto a pre-scored and printed cover, clamping them together until the adhesive cures. Perfect binding machines are semi-automated, performing most of the actions automatically via controls set by the operator.
What You Need to Perfect Bind
Great Equipment Features to Look for & Why
- Automatic job setup and recall: machines that feature job recall can make repeat projects quicker and smoother, eliminating setup and testing time.
- Advanced quality control: Some unique systems offer CCD cameras and thickness or weight checking systems in place that help ensure consistent and quality binding.
- Versatile adhesive compatibility: choosing a machine that allows for both PUR and EVA glue gives you the most versatility with book creation.
- In-line scoring: some machines include in-line scoring that eliminates the need to use pre-scored covers.
- Automatic, pneumatic clamping: this feature will automatically clamp your book block and adjust without settings to your book thickness
How to Perfect Bind
Perfect binding varies significantly depending on your machine, so this overview is more about the process than a machine:
- Place your book block into the machine and clamp it
- Send the book block through the nipping machine using the controls
- Support the pages, if needed, as the cover is attached to the book block on the other end
- Remove your finished book
Who Uses Perfect Binding
Due to the investment in equipment required, perfect binding is ideally suited for publishing companies and large businesses who need to bind softcover books frequently and in large volumes. University print shops use them for course catalogs and textbooks while medical offices may use them for educational materials. The users and applications are varied; any business that needs a sleek and fully customized cover bound book in higher volumes can benefit.
TLDR for Perfect Binding: Key Takeaways & Things to Note
- Semi-automated machinery
- Two glue types: PUR for hard-to-bind stock and EVA for standard
- High initial equipment investment
- Fast, professional bound documents
- Binds softcover books, also known as softback or paperback
Tape Binding
Tape Binding Supplies:
Tape binding is quick, simple, and works great for mailers and simple presentations. Strip tapes made of a fabric with adhesive are adhered to the spine of your book. Tape strips for binding come in several colors and even different textures, such as linen or leather-like. They wrap partially around the front, over the spine, and onto the back cover of your book. You use your own covers for this binding method. They come in three different strip widths, which makes for a low consumables cost as each strip width can bind a wide variety of book thicknesses. So instead of buying 16 different sizes, you only need three to cover all your bases. The largest size can bind up to 350 sheets of 20# paper, or a 700 page book.
Tape Binding Machines:
Tape binding machines are exceptionally easy to use. Typically they are tabletop units that are semi-automated where you place your pages in and just insert a strip into the machine so it can bind for you. With the addition of some optional equipment and supplies, you can also make hardcover books using tape binding.
What You Need to Tape Bind
- Tape binding machine
- Tape binding strips
- Custom report covers (optional)
- Scoring/creasing machine for covers (optional)
- Hardcover guide (optional; if using for hardcovers)
Great Equipment Features to Look for & Why
- One-touch control: This simple feature makes binding as simple as just one-touch. No complicated setup needed, just push to bind.
- Automatic strip size detection: A machine offering this feature will know what size strip you need to use as soon as you place the pages into the hopper. This means you no longer have to measure the spine and reference a chart to determine the best fit.
How to Tape Bind
- Place your pages into the machine
- Press the start/bind button
- Insert the binding strip
Who Uses Tape Binding
Tape binding machines have an investment starting at around $1,000 for the smaller machines or more than $5,000 for the larger ones, which makes it a good fit for medium to larger offices. And because they are so fast and easy, they are great for places where there may be multiple users or where small or large batches of books are needed. Tape binding is used for university catalogs, product manuals, mailers, real estate presentations, and even for self-published books.
Tape Strip Sizing Guide

TLDR for Tape: Key Takeaways & Things to Note
- Tape bound books are completely flat with no bulky spine
- One of the fastest and easiest machines to use
- Ideal for medium to large offices with multiple users
- Low maintenance machines
- Professional finish
- Use your own customized covers
- Excess strip overlaps onto the back or cover so the front remains clean and uncluttered
- Fastback Bindings are fully recyclable and contain 30% recycled and/or post consumer waste content earning an FSC (Forest Stewardship Council) certification
Booklet Binding/Making
Booklet Making Supplies:
Booklet making is an extremely accessible and affordable way to bind as it only requires staples or stitching wire and the ability to fold your documents in half. Booklet making machines combine the process of folding and binding into one simple movement allowing you to produce tens to thousands of booklets per hour. Because the bind is created with compatible staples, these machines are great for those looking for an entirely paper finish and a maximum of 80 pages, or 20 sheets, bound.
Booklet Making Machines:
You can bind booklets with one of two methods: using a booklet making machine or using a long-neck or saddle stapler. Booklet makers are the most efficient tool as they fold and staple the booklet at the same time. They are often tabletop machines but can size up to larger industrial models for faster output and extra automation like trimming and precise aligning.
What You Need to Booklet Bind
Great Equipment Features to Look for & Why
- Adjustable staple heads: A machine that allows you to adjust where a staple lands allows for you to customize your bind for larger and smaller booklets. Occasionally, they may even have an automatic page size detector and will adjust automatically for the ideal placement.
- Separate fold and staple functions: Some machines come with the ability to just fold or just staple in one pass or both simultaneously. The option to choose allows you to avoid stapling when not needed or save vertical space with unfolded booklets.
- Staple compatibility: Some booklet makers require specific staples to be used in their machines. The wider the compatibility range the easier it will be and often cheaper to shop for consumables.
- Paper size options: Many booklet makers can handle a variety of page dimensions, but if you plan on deviating from standard sizes, be sure to find a model with custom paper sizing.
How to Bind Booklets
- Place document into the feed tray
- Press start, pull the handle, or use automatic detection to bind
- Remove your folded/stapled booklet and repeat
Who Uses Booklet Binding
Because of its fast process and minimal supply requirements, booklet binding is ideal for those looking to quickly create a high volume of organized printed material for minimal costs. The ease of use also makes this style of binding extremely accessible, available to multiple users with minimal to no training. Booklet binding is often utilized for programs by churches and theaters or brands and small businesses for magazines, menus, and pamphlets. The simple and effective bind is also great for schools, offices, and others looking for a fast, professional, and effective way to bind without breaking the bank.
TLDR for Booklet Making: Key Takeaways & Things to Note
- Easy and simple way to bind; fold & staple in one-step
- Minimal supplies needed
- Supplies are low-cost
- Perfect for pamphlets, event programs, welcome booklets, & more
- Some machines accommodate up to 80 pages
Stitching Machines
Stitching Binding Supplies:
Stitching is for when you are ready to take stapling to the next level. Instead of individual staples, stitching machines use spools of wire to essentially form the staple or stitch as a part of the binding process. Stitching machines are the most economical way to bind high volumes of booklets, taking the already low costs of stapling and reducing the price of the staples by almost 10x replacing them with wire. Stitching machines certainly have a more industrial feel and have a higher upfront cost, making them the ideal tool for those who are going to be mass stapling/stitching and can use the high-yield, low-cost consumables.
Saddle Stitching Machines:
Saddle stitching machines are highly customizable, available to be used as a single-head or even multiple heads. Saddle stitching refers to the act of stitching along the fold of paper, as if the paper is draped across a saddle. The key difference in stitching and booklet making machines other than the fastener itself is that stitching machines do not fold the paper automatically. It instead acts more similar as an industrial stapling machine, opening it up for more diverse projects.
What You Need to Stitch Bind
- Saddle stitching machine
- Additional stitching head (optional)
- Stitching wire
- Folding or creasing machine (optional; to prepare your pages for stitching)
Great Equipment Features to Look for & Why
- Available stitch types: Most machines will come with saddle stitching, stitching across the fold, as a default. However, if the machine can also handle flat stitching then it will be able to stitch across a number of different projects not just relegated to the fold, making the machine exponentially more valuable.
- Work table: Stitching heads can come with a stand and built in work surface or can be attached to your work table. The ability to work with a larger surface will allow easier maneuverability as well as safety while operating the machine.
- Corner stops: Keep an eye out for unique table features such as a corner stop to perfectly stitch corners together.
- Stitch capacity: The amount of pages a machine can handle can range drastically. Many can handle between 2 pages and 1/4” thick stack of paper (approx. 60 pages) some can handle much higher such as 1-1/4” of paper.
How to Stitch Bind
- Align your document underneath stitching head
- Operate machine with foot pedal or button
Who Uses Stitch Binding
With the stitching machines' low consumable costs yet still largely handheld operation, these machines are ideal for smaller print shops and other medium size printing operations looking to print booklets, magazines, catalogs, and more. You know it is time to switch from stapling to stitching when the idea of running through 60,000 staples in one spool sounds like a save and not a waste.
TLDR for Stitch Binding: Key Takeaways & Things to Note
- Stitching is ideal for bulk stapling operations
- Stitching spools can cost almost 10x less than staples
- Cost effective booklet style binding for large volumes
Staple Binding
Staple Binding Supplies:
Staplers have become one of the most tried and true ways of attaching one piece of paper to another. We may all have an image in our head of the average manual desktop stapler, but staplers come in some surprising options.
Staples:
There really isn’t much to say about staples, except that they are a very low-cost consumable and come in a variety of capacities. Choose the size that is ideal for your document stack thickness and compatible with your stapler for the perfect cinch, every time.
Staplers:
Staplers can be either manual or electric. Manual staplers feature the common lever mechanism to insert the staple. There are powered electric staplers as well that use foot pedal or even page detection to then automatically insert the staple. Single-head, double-head, and triple-head staplers mean you can add up to three staples at the same time. Throat depth decides how far from the edge of the page a staple can be inserted. Some staplers come at a fixed depth while others are adjustable to accommodate various projects. Stapler capacities range from 2 to 200+ sheets.
What You Need to Staple Bind
- Stapler
- Staples
- Staple remover (optional)
Great Equipment Features to Look for & Why
- Electric automation: If you are going to be stapling more than a handful of papers for a project nothing will save your hands like the automated inserting of staples. Electric staplers speed up the process and the extra power helps prevent half inserted or wonky staples.
- Adjustable depth: If you are planning on stapling anything other than the edges or corners of your paper, this feature offers the flexibility to work with multiple sizes of paper.
- Multiple heads: If you staple multiple times on a document often, having a multi-head stapler can double or triple your operating speeds.
- Multiple staple size compatibility: Choosing a machine that is capable of handling different sizes of staples expands your capabilities and ensures a perfect cinch, every time.
How to Staple Bind
- Align paper in stapler
- Staple (manually push down, press foot pedal, ect.)
Who Uses Staple Binding
Staple binding is perhaps the most common way that people bind together paper on a day to day basis. The wide range of types and capabilities along with its compact size allows staplers to easily find a space in office, school, and even home life. Staplers are a simple and cost effective way to bind smaller documents such as reports, presentations, meeting notes, educational materials, and more. If you want to quickly and easily connect one piece to another, staplers are great and simple.
TLDR for Stapling: Key Takeaways & Things to Note
- Good for smaller documents
- Simple binding without a necessary machine
- Small and compact for easy desk use and storage
- Less precise and formal bind
Hardcover Binding
Hardcover Binding Supplies:
Hardcover binding is all about glue! To hardcover bind you add adhesive pages to the front and back of your bookblock. To fast bind you can simply insert your block into the cover, align it to the spine, and peel and stick the adhesive pages to the inside of your cover. For a more indepth bind you can score the inside of your spine, for a stronger hold, and add EVA glue to adhere your book block directly to the spine as well, securing your bind on all sides.
Hardcover Binding Machines:
To hardcover bind you need your custom hard cover wraps, adhesive end sheets, and EVA binding glue. The end sheets are used to attach the first and last page of your book block to the cover while the binding glue is used to attach the spine. Quality glue and adhesive sheets are a must-have when hard cover binding to ensure longevity and strength through handling.
What You Need to Hardcover Bind
- Hardcover binding machine
- Hard Cover
- Adhesive endsheets
- EVA glue
- Edge crimper (optional)
Great Equipment Features to Look for & Why
- Built in stapler: Machines that include a stapler allow you to put together your bookblock and bind your book with the same machine. Just be sure that the stapler can handle your project thickness.
- Spine crimper: A built-in spine crimper allows you to finish your bind and create a more professional look along the spine by crimping-in each side.
- Multi-functional systems: Hardcover machines can be capable of multiple types of binding since they all require a similar gluing process. Keep an eye out for machines that can also perfect/softcover bind and make pads.
How to Hardcover Bind
- Add appropriate glue to the tank and allow to melt
- Insert hard cover and align book block with end sheets on either side
- Score cover spine and apply glue
- Press cover against book block to position adhesive
- Wrap cover over the book block spine
- Crimp the spine on both sides
- Peel endsheet cover and close cover over the adhesive to seal
- Repeat endsheet sealing to the other side
Who Uses Hardcover Binding
Hardcover binding is ideal for those looking to self publish books, photographers and photo studios for photo & memory book creation. It is also popular for schools and companies who make yearbooks and other more professional and long lasting books. Hardcover binding machines can have a higher upfront cost and require a bit more manual labor while still being reasonably easy to use. These machines are ideal for those looking to create high-end, durable book-like documents with a decent amount of frequency.
TLDR for Hardcover: Key Takeaways & Things to Note
- Professional and durable book finish
- Fast bind with only adhesive end sheets
- Hardcover machines can often also handle perfect and pad binding
- Perfect for yearbooks, photobooks, and high-end portfolios
Pad Binding/Making
Pad Binding Supplies:
Making pads of paper requires some simple supplies. You will need a specialty padding glue adhesive that is flexible enough to bend and allows pages to be torn off. There are two kinds: standard for general pad making or fan-a-part for multi-part forms. A durable pad brush is also needed to apply the adhesive. Chipboard backings are also needed to create some stability and can have magnets added to the back. Optional accessories for higher volume pad binding include things like padding knives to separate the pads by cutting the adhesive and pad counters to help sort. You can also add magnetic strips to the back to make your notepads into magnets.
Padding Machines:
Padding machines are available in low and high volume models to accommodate making just a few or several hundred pads at a time. They come in models as simple as clamping mechanisms up to fully automated machines for high volume users. They are simple to use and essentially hold your stacks of pages tightly together so a specialized glue can be applied to the edge to create a notepad.
What You Need to Make Pads of Paper
- Padding machine
- Padding glue adhesive
- Chipboard backings
- Padding brush
- Padding knife (optional)
- Pad counter (optional)
- Magnetic strips (optional)
- Paper jogger (optional)
Great Equipment Features to Look for & Why
- Squaring mechanisms: Pad making requires all pages to be perfectly square before binding them. An included squaring mechanism can help with the process. Are there walls to push up against? Is the surface on a tilt?
- Easy to clean: Pad making often requires manual application of sticky glue that can drip onto your machine and work surface. Some machines offer troughs and other features to help reduce mess.
- Capacity and size: The binding capacity for a pad maker can range drastically from 10 pads to 100s of pads all drying at once. Choose a model that will accommodate your volume and workload.
How to Pad Bind
- Use your pad counter to collect the same number of sheets for each pad and add a chipboard backing to the bottom of each stack.
- Square and clamp your stacks using your padding machine or a standard clamp and stable work surface.
- Apply a thin layer of glue to the clamped edge. Make sure you apply glue all the way to the edges.
- Allow the glue to try completely and apply additional layers, if needed.
- Use a pad knife to cut the dry glue below each chipboard backing.
Who Uses Notepad Binding
Pad binding is an easy way to create notepads and writing pads that hold pages together but are easily tearable. Pads are a great tool to add branding or messaging to and customize to your business. Due to the more manual process, pad making is often used by a variety of businesses, including small to large print shops as well as industrial shops who can justify the automated machine for its high yield. However, the materials required to start small batch pad making are low cost, so could be an option for small businesses looking to bring some custom stationery making in-house. Individuals can even make their own pads of papers for gifts or to sell on their Etsy shops.
TLDR for Pad Making: Key Takeaways & Things to Note
- Paper is bound by clamping and applying a flexible, tearable glue to one side
- Models available from manual clamps to automated machines
- Great way to implement custom branding
- Useful for easy to use note and memo sheets
- Easily customizable with magnets and personalized paper stock
- Bind one or hundreds of notepads at a time
Congratulations, Graduate
If you’ve made it this far, then you can move that tassel to the other side of your cap, because you just graduated from Binding Machines 101. It was a long guide and covered a lot of topics, so kudos to you for sticking through and getting the knowledge you need to make the most informed decision for your investment. Whether buying for your industrial shop, business, or home, you are now well-prepared to take the next step.
When you buy a binding machine from MyBinding, you are choosing a company with over 90 years of experience in the industry; a claim that very few companies can make! Our commitment to customer care and getting you truly helpful and human information set us apart from the AI-driven noise you may find elsewhere.
Or call us at (800) 944-4573 for one-on-one help finding the perfect machine for your unique needs.


Got Questions ?
Chat with one of our
friendly sales staff.
Validate your login
Sign In
Create New Account