


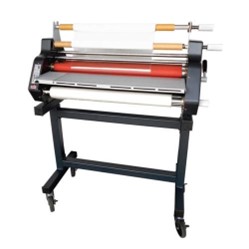
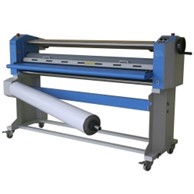
Loading a new film roll onto your laminator can seem like a daunting task. However, there is an easy hack to make threading new laminating film a breeze. All you have to do is keep a little bit of film leftover from the old roll in the machine. You can use that existing, loaded film in place of a laminator threading card. All you need to do is follow these instructions when replacing your film:
How to "Hot Swap" Roll Laminating Film
- Preheat the laminator and remove the feed tray.
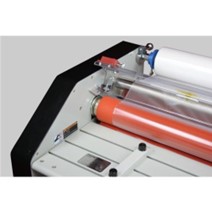
- Cut the remaining top and bottom film webs between the supply rolls and heat rollers, separating the old rolls from the pre-threaded film. Do not allow the adhesive side of the film to contact the heat or pull rollers. Liquefied or tacky adhesive deposited on heat rollers will require the rollers to be cleaned.
- Raise the safety shield to the upright position.
- Remove the bottom film supply roll from the laminator and lower the bottom film guide. To remove the bottom roll of laminating film:
- Slide roll to the right to release it from the hex shaped brake hub.
- Loosen the locking screw on the left retaining collar of the film supply shaft and slide the collar off.
- Pull the shaft partially out of the film tube and then push it back in to knock out the left core.
- Pull the shaft all the way out of the tube and remove the remaining core adapter.
- Load the new bottom film
- Slide one core adapter into the right side of the new roll of film ensuring that the film will unroll properly (from the bottom).
- Slide the film shaft into the core adapter and tube from the right side.
- Place the other core adapter on the shaft protruding from the left side then replace the retaining collar.
- Tighten the locking screw.
- Unroll enough film from the bottom roll of the film to slide under the bottom idler bar and tack to the existing film.
- Slide the bottom idler back into place and replace the supply roll shaft.
- Repeat steps to replace the top supply roll and then tack film to the existing laminate.
- Install the feed table and lower the safety shield.
- Run the laminator on the slowest speed setting to begin pulling the new laminate through the rollers.
- Observe the film being pulled through the laminator to assure that the old film and the new film are advancing correctly. Any separation between the films will require stopping the motor immediately and correcting the situation.
- Stop the laminator after the newly threaded film has completely exited the laminator.
This video walks you through how to do this laminating hot swap on the GBC Ultima 65 for example:
The hot swap method for loading laminating film onto your laminator is an excellent choice if you want to save some time. It does, however, take some practice and can be a little bit tough to get the hang of. Try it a few times on your laminator and you should be able to master this technique and save yourself some time when changing laminating film in the future. If you can’t quite get the hang of it or you have fully run through your old film roll no worries. You don’t need anything fancy to act as a threading card. All you need is some scrap material, ideally cardboard but paper can work too, to act as your threading card to run the laminate through.
If you have run out of laminate and are looking for new rolls of all different thicknesses and finishes you can browse our collection here.