


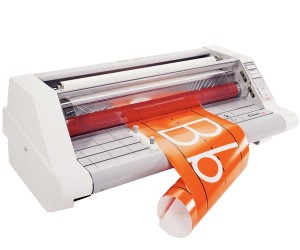
Most schools have a roll laminator to laminate posters, name tags, student work, maps, and so on. In fact, they make specific school laminators due to their popularity with educators. Although these devices are easy to use, many people still need some help learning how to operate them. Let’s go through everything you need to know to successfully use your school laminator.
How to Load or Change Film on Your School Laminator
Unfortunately, loading laminating film onto your school laminator is often the hardest part. In fact, the number one reason for service calls on school laminators is that the film was loaded incorrectly. With that in mind, it is important to be very careful when loading film onto your laminator so that you don’t accidentally load it incorrectly. If you attempt to use your laminator with an improper film setup you will inevitably get adhesive all over your rollers causing a big mess, a laminator jam, and potentially ruin your machine.
Top ways people incorrectly use their school laminator:
- Laminating with only one roll loaded on your machine. You have to use both top and bottom rollers when laminating. There are ways you can accomplish one-sided lamination but this is not one. The exposed film will stick to the opposite roller.
- Trying to use two different widths of laminating film at the same time. It can feel like a smart option especially if you only have one roll left of a particular size. However, similar to loading only one roll, laminating two different widths together will leave some of the film’s adhesive exposed to the rollers making a big sticky mess.
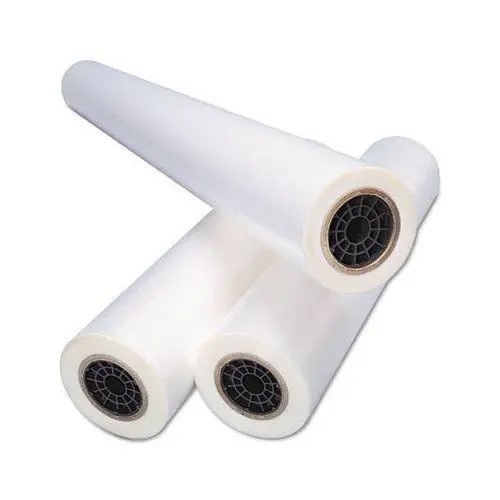
- Loading laminating film upside down. Roll film has a shiny side and a dull side. The dull side contains the heat-activated adhesive. You want the adhesive side to be what makes contact with your document. If it is the other way around you will end up laminating your laminator. To avoid this, make sure the shiny side of the clear film is in contact with the heat rollers and the dull side with the adhesive is facing out.
- One or both rolls of film are allowed to completely run out. It may seem innocuous but using your film roll to the very end can pose a number of potential issues. If one runs out before the other you are now laminating with only one roll loaded. Even if they both run out at the same time the film will lose tension and may shift inside the machine misaligning the film and causing it to get on the rollers. The good news is, if you don’t run your film completely out you can use it to help you load new rolls onto your machine. “Hot swapping” can be a much easier and faster way to load your machine when done correctly.
Keep all these potential problems in mind while you load your machine so you can avoid any issues. If you do unfortunately end up with your film wrapped around your rollers, learn how to unjam your roll laminator here.
Step by Step How to Load a School Laminator
Here are the simple steps for loading film onto your school laminator. Please keep in mind that you should always replace both rolls of film at the same time.
- Identify the sides of your film. As mentioned above there’s a shiny side and the dull side to every roll. It is important to identify these sides before you begin. Only the shiny side should ever make contact with your laminator’s rollers. The dull side contains the adhesive and should be facing out towards the document.
- Turn the main power switch off. If the laminator is already hot, turn the main power switch off and allow it to cool down before attempting to change the film. While some laminators allow for roll changing while hot it is best to change film rolls with a cool machine to avoid burns.
- Remove the feed table from the laminator so you can see both rolls of laminate that are mounted on the laminator.
- Cut the remaining top and bottom film webs. Cut the film feed between the supply rolls and the heated rollers. Be very careful not to cut the rollers in the process as they are easily pierced and any marring will ruin them.
- Raise the safety shield to its full upright position and pull the top piece of film down.
- Remove the existing film from the laminator. One of the easiest ways to accomplish this is to turn on your machine and use the reverse function of the laminator to slowly back the laminate out of the machine. Be careful during this step that no adhesive makes contact with the rollers on the laminator. You may need to reinstall the feed table to complete this task. Just remember to remove it again after the film has been removed.
- Remove the bottom roll of laminating film by sliding it to the right to release it from the hex-shaped brake hub.
- Remove the roll from the supply shaft. Loosen the locking screw on the left retaining collar of the film supply shaft and slide the collar off. Pull the shaft partially out of the film tube and then push it back in to knock out the left core. Pull out the shaft all the way out of the tube and remove the remaining core adapter.
- Load on the new roll. Slide one core adapter into the right side of the new roll of film ensuring that the film will unroll properly (from the bottom). Slide the film shaft into the core adapter and tube from the right side. Place the other core adapter on the shaft protruding from the left side then replace the retaining collar. Tighten the locking screw.
- Lower the bottom idle bar.
- Load the bottom film roll. Unroll about 2ft of film, push the idle bar back into place, and drape film over the bottom roll of film. Place the bottom roll of film back into the round hole in the right side frame and the left side into the hex-shaped brake hub.
- Remove the top film supply roll from the laminator and repeat steps 6 through 9 above. Ensure that when you install the film onto the roller that the film will unroll from the bottom after the film supply is loaded back on the laminator.
- Load the top film roll. Place supply back into machine. Unroll about 2ft of film and drape the film over the top idler bar and completely over both heat rollers.
- Thread your film. Follow your laminators instructions and properly thread your laminated feeds through your machine using the diagram provided with your machine. This threading is called the “web.”
- Replace the feed table. Slide the feed tray under the bottom film web that is draped over the bottom roll of film. Reinstall the feed table so that the bottom film is resting on the tray.
- Line up your threading card. Slide the threading card between the feed tray and the laminating film that is laying on the tray. Gently push the threading card into the nip area of the heat rollers. The card should now be guiding both rolls of film into the heat rollers.
- Feed the film through your laminator. Lower the safety shield and press the RUN button on the laminator. Watch the leading edge of the threading card to ensure that it enters the nip area of the heat rollers and is being pulled into the laminator. Push STOP once the threading card has exited the rear of the laminator.
- Turn on the laminator. The power switch is usually located at the back of the device.
- Check that all elements are in place. Take a moment to ensure that the heat shield and feed tray are properly positioned. If these parts aren’t in the right place, you won’t be able to use your laminator.
- Adjust your settings. When you turn on your laminator, chances are it went to its default setting. Depending on how thick your laminating film is, you’ll need to adjust the speed and heat settings. Thicker films require the machine to be on a slower setting while thinner films need faster settings. You should consult the machine’s instruction manual to see which settings are best for your needs.
- Allow the machine to warm up. The laminator will need some time to warm up. Some devices can take up to 10 minutes, so it’s a good idea to turn on your laminator ahead of time. When the machine is ready, the “ready” light will go on.
- Prepare your document. Place your materials on the machine’s feed plate. Make sure they are centered.
- Run your document through the laminator. Press your laminator’s “run” button to begin the process. Once the machine’s rollers start moving, you can push your materials into the nip area.
- If you have multiple things to laminate, you can continuously feed them into the device. Make sure that the items don’t overlap.
- Remove your document from the film feed. When you’re done laminating, stop the machine. If the laminator has a film cutter, use it to free your items. You can do this by pressing down on the cutter’s handle.
- Turn off your machine unless you have more items to laminate. Depending on your machine, it might have a standby mode that will kick in, which will conserve energy in between laminating jobs.
Using a school laminator is pretty simple, but loading the film can be somewhat tricky. Service calls can be costly, so learning to load film correctly is important. Once your film is properly loaded you are ready to laminate. Don’t be afraid to contact us if you need help
How to Laminate with a School Laminator
You should now have a beautifully laminated project. If you need advice on how to trim your laminate, you need help troubleshooting flaws you see in your finish, or you have any other questions we encourage you to explore our laminating knowledge base. If you still can’t find the answer to your question reach out to our customer support team at 1-800-944-4573 or by using the chat below. We will be happy to help you.